Kit Number: JT 18
Media: Injected Plastic
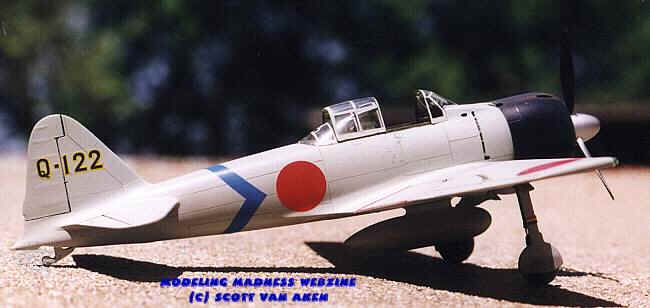
Decals: Three versions -- Overall grey 'Q-122' from 2nd NAG, and two in green upper and grey lower; one from Tsukuba NAG and one from Tinan NAG flown by ace NAP 1/C Tanimizu.
The Type 32 A6M3 was a clipped wing version built to try to improve performance. Only about 300 of this type were built and most were used on land bases so the arrestor hook was removed. Although the roll rate was improved, the loss of wing area meant the climb rate was diminished somewhat, and the aircraft was not as popular as the later Type 22 that supplanted it. To my eyes, the clipped wing Zero looks better than the other versions. It looks much better than the clipped wing Spifire, which to me, looks downright ugly!!
This is a typical modern Hasegawa kit. That means beautiful molding, great fit, and thick decals. Since Hasegawa has released a bunch of different versions of the Zero, there are a few areas that accommodate the various versions, and those areas are what gave me the most trouble during construction. Molded in typical Japanese grey styrene, the interior is the first part to be built. It is beautiful and needs, to my eye, no aftermarket parts at all. There are instrument decals for each dial. And they fit! All I did was drill out the holes in the back of the seat. The interior was sprayed with Aeromaster Mitsubishi Interior Green. This was the first time I have used Aeromaster paints and I am impressed. The interior was they washed with black and highlighted with a lighter green and then drybrushed with
some aluminum. Looks very good indeed.
Wing and fuselage assembly was trouble free. There is a plug for the tailhook that did not fit well and needed to be trimmed to fit. Also the carb intake at the front of the wing is a separate piece and the fit there was less than great. This is where I used putty. The engine is a four piece affair that looks super after painted and given a black wash. The canopy is super clear and thin. It is a three piece deal and looks super in the open position. Masking was fun, but since most panels are straight, it was not difficult.

Painting was next. The aircraft is overall IJN grey, for which I used Xtracolor paint. It airbrushes very well, dries gloss in just a few hours and is very thin, allowing all the kit's detail to show through. The engine cowling was painted using a mixture of Sea Blue and Black, and the main landing gear struts were done in gloss black.
This kit is highly recommended and I know that I will be building more in this series.